Testing bots
Why should you test your bots
When you start your first bot with maybe one or two files containing dialogs, it may not seem necessary to create a test for that bot. But as your bot grows, the complexity of your bot grows at the same time. This growing complexity also means that there is a higher chance of unexpected things happening when a small change is made. A way to manage this growth in complexity is by creating unit-tests. Each unittest describes a part of the code that is in your bot. The test ensures that when you change code internally, nothing changes for the person talking to the bot.
Test-driven bot development, an example.
Test-driven development (TDD) is a development style where the code is driven by (you guessed it): tests. This means that we usually start writing tests before we write the functionality in code. We will create a bot that can perform addition and subtraction written in words.
Instructions are given to the bot in the following manner: "add 10 and 20", "subtract 5 from 10". With this, we have enough to start creating tests for our bot, and from these tests, we will create the actual bot. Tests do not have to be written in the same file, they can be seperated into multiple files.
test "the bot greets us with its name" do
  expect "Hello I am CompuTron"
  expect "What do you want to compute"
end

test "adding two numbers" do
  expect "What do you want to compute?"
  say "add 5 and 5"
  expect "10"

  # addition of negative numbers
  say "add -5 and -10"
  expect "'-15'"

  say "add 5.5 and 5"
  expect "'10.5'"
end

test "subtracting two numbers" do
  expect "What do you want to compute?"
  say "subtract 5 of 50"
  expect "45"

  say "subtract 100 of 50"
  expect "'-50'"

  # test if we can subtract negative numbers
  say "subtract -50 of 50"
  expect "100"
end

test "not yet trained" do
  expect "What do you want to compute?"
  say "multiply 4 with 2"
  expect "not trained"
end
The code for the test cases is also written in Bubblescript. Instead of writing
a dialog {{do..end}} block, we use test do… to define a test-case.
The string that follows the test statement
describes what we are testing for, thus giving more context.
Inside the test block we can use the
expect statement to define what we expect
the bot to say at that point. The expect statement is exhaustive, meaning it
will wait for the bot to stop saying things and then check whether the expected
thing was received. At the moment, only say and ask can be tested, statements
like show and events will be supported in the future.
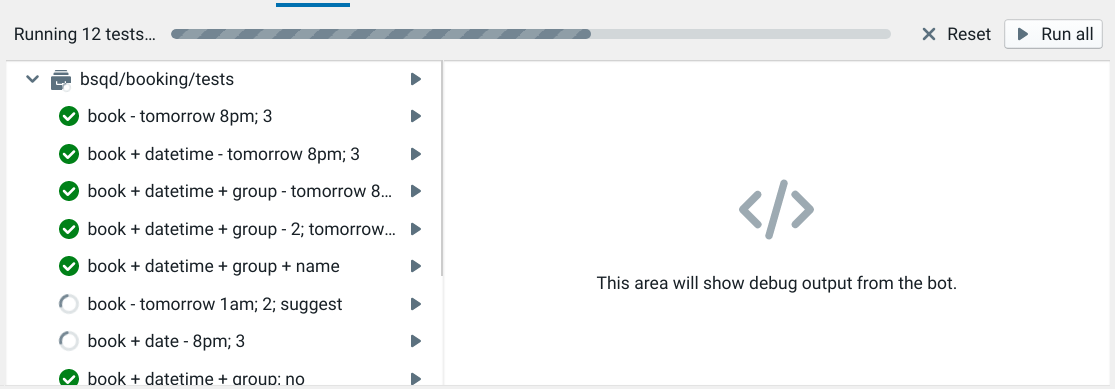
Running the tests
We can run all the tests with Ctrl+Alt+T or by clicking the "Run All" button in the "Tests" panel in the editor. To only run the test in one file, or even a single test case, you can click on the "play" button to the right of the item in the tree navigation.
Below is the implementation of the calculation bot according to the tests that were written for it. The regex in the @number constant matches on negative numbers, and on floating point numbers. When we run all the tests in the studio, they should now all have a green checkmark in front of them.
Try interacting with the bot yourself!
To repeat the last run of the last testcase, press ctrl-alt-T, or cmd-alt-T on mac.
Writing tests
To start creating tests, you need to first create the test script to put them in. These test scripts are separate Bubblescript files, which are not used in your normal bot, but only evaluated while the tests are running.
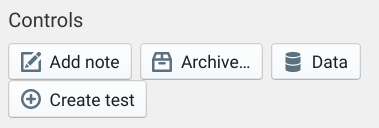
In the build area, click Add script -> Test case; enter the name of the test, and click Add. You now have a file in which you can write your tests.
A best-practice is to organise your tests in folders; to "magically" put your test file in a folder, add the folder name in slashes to the file name. For instance, to put your 'user_tests' file in the 'tests' folder, call the file
tests/user_tests.
Creating tests by using the preview window

While you are developing your bot, you can save the conversation
you've had with a bot so far into a test file. Do this by switching to
the Tests panel while your bot is running in the preview, and then
click the "Create test" button. A test case will be created and it
will be put in the file called tests/auto.
Creating tests based on conversations
We created the tests above by hand, which is something you would do if
your bot has not been interacting with people yet. But, if your bot
has had interactions with people, you can navigate to a conversation
in the Inbox part of the studio and click the "Create test" button on
the right panel. This will take the conversation and convert it to a
test. A test case will be created and it will be put in the file
called tests/auto.
This way, you can refactor parts of your bot while making sure that this conversation is still a valid one.
Testing quick replies
Sometimes you want to check if the bot has set any quick replies after an
ask. You can do so by inspecting the local variable last_quick_replies,
which always contains the last quick replies that were sent to the script.
For example, you can test the quick replies of this script:
dialog main do
  ask "Do you want it, yes or no?", expecting: ["yes", "no"]
end
Using a test case like this:
test "quick_replies" do
  # wait for the `ask`
  expect "yes or no"
  # last_quick_replies has been set here
  assert ["yes", "no"] == last_quick_replies
  assert contains(last_quick_replies, "yes")
end
Submitting data in tests
Oftentimes, you'll want to request specific data in an ask, such as a location
or an image. These interactions can be tested as well, by using submit in your
tests to send example data and continuing the dialog. For example, imagine
writing a bot where you want to request an image from the user in order to
create a damage claim. You can ask for an image as follows:
dialog request_image do
  image = ask "Please upload a photo of the damaged item", expecting: :image
  say "We're processing your request!"
  # perform make_a_damage_claim
end
You can test this code using submit like so:
test "a damage claim is created after uploading an image", dialog: request_image do
  expect "Please upload a photo of the damaged item"
  submit attachment(type: "image", url: "https://example.com")
  expect "We're processing your request"
  # .. assert that a damage claim was created here
end
Here we're using the attachment builtin function to create a fake image, and
using that to continue the dialog so we can test the code that comes after the
ask. There are builtin helpers for constructing various types of messages:
submit attachment(type: "image", url: "https://example.com")
submit location(lon: 20, lat: 40)

# Same as `say`
submit message("hello")

# Or with more complex data, such as when using input_method:
submit message("hello", data: "bye")
This can also be used to test dialogs that have intent triggers on them:
@hello intent(match: "hello")

dialog trigger: @hello do
  say "hello back"
end
With the test script:
test "it responds nicely to hello" do
  submit message("", intent: @hello)
  expect("hello back")
end
Here, we overwrite the intent from the message and use that to manually trigger the parts of the code that we want to trigger.
Testing input methods
Besides asking for a :location, :image, or similar, you can also ask for
more complex input methods such as with forms. These too can be tested with
submit. For example:
dialog main do
  choices = input_method("item_picker",
    caption: "Please select",
    mode: "multiple",
    items: [
      [title: "Frontend developer", subtitle: "React, HTML, Javascript", value: "frontend"],
      [title: "Backend developer", subtitle: "Elixir, Erlang, bash…", value: "backend"],
      [title: "Marketing manager", subtitle: "Hubspot and Facebook marketing", value: "marketing"]
    ])
  ask "Which positions are you interesed in?", expecting: choices
  say "Looking up positions for #{answer.text}"
end
test "it asks for a desired position" do
  choices = input_method("item_picker",
    caption: "Please select",
    mode: "multiple",
    items: [
      [title: "Frontend developer", subtitle: "React, HTML, Javascript", value: "frontend"],
      [title: "Backend developer", subtitle: "Elixir, Erlang, bash…", value: "backend"],
      [title: "Marketing manager", subtitle: "Hubspot and Facebook marketing", value: "marketing"]
    ])

  expect choices
  submit message("Frontend developer", data: "frontend", type: "item_picker")
  expect "Looking up positions for Frontend developer"
end
Testing tasks
The tasks that are created in your bot are also available in the tests.This
means that you can run them by using perform in your test script. All the
variables that the task might need, including constants are also available in
your test script. The assert statement can be used to test whether a task has
done its job correctly or not.
The following example demonstrates how to test tasks:
main:
dialog main do
  say "Hi"
  ask "What is you age?"
  perform set_age
end

task set_age do
  user.age = answer
end

task birthday do
 user.age = user.age + 1
end
tasks_test.test:
test "users age is set correctly" do
  answer = 42
  perform set_age
  assert user.age == 42
end

test "age is incremented by birthday task" do
  user.age = 42
  perform birthday
  assert user.age = 43
 end
Because the tasks we test require certain variables to be available, we have to set them explicitly in the test script. If these variables would come from constant, the values for these variables would be available automatically.
Testing tags
You can use expect tag: "tagname" to check that a conversation is setting a certain tag.
dialog main do
  tag "hello"
  untag "goodbye"
end
test "the conversation is tagged" do
  expect tag: "hello"

  # and the untagging as well:
  expect untag: "goodbye"
end
Testing closing of conversations
You can use expect :close to check that a conversation is closed using the close statement:
dialog main do
  close
end
test "the conversation is immediately closed" do
  expect :close
end